Showing posts with label hat. Show all posts

Thursday, May 24, 2012

Pinned it!!!


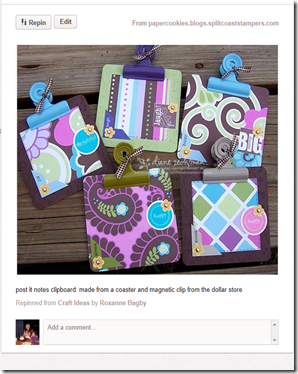
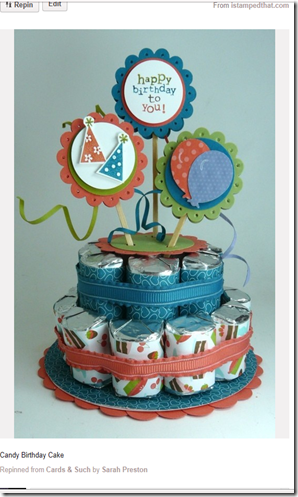
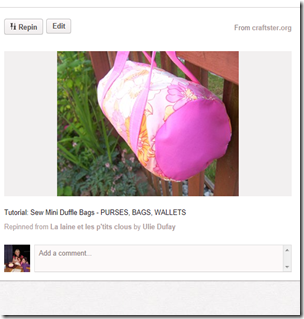
Every morning after checking emails, my Facebook pages and the Made It store I always jump on Pinterest to see what I can find and what everyone else is pinning.

I just love this site, my inspiration board.  I thought I might share what I found today.

image


image

image

image

image


Do pin? Would love to know some of your favourite finds.

Happy Pinning!!!!

Tuesday, November 15, 2011

Linkup Party Likes #17


I know it’s that time of the week again.  Sorry the post is a day late but have been busy with a very unhappy little man who is not liking the hot weather we are having in sunny Queensland.

A very close friend of mine had her first baby last week.  He is so adorable and so tiny.  Can believe my little man was the same size as him.

DSC06210

I had already made a bib and some burp clothes for her at the baby shower but wanted to give the little man something at the hospital so I used this pattern to make these adorable little shoes and drafted my own template for the tie applique. 

DSC06375

Only problem was my machine started playing up so had to hand sew around the tie.

After looking through all the wonderful things everyone has been creating over the last week, I thought I would stick with a theme and seek out anything to do with babies.  And here is what I found:

Binge Crafter used a pattern from One Yard Wonders to make this adorable little dinosaur for a new nephew.  Love the matching wipes case:

IMG_1587


Here is a different take on the old nappy cake, Diaper Babies!  Northern Cottage has use nappy’s to gift a washer and socks in a gift basket:

home 050_thumb[25]


And who could resist these gorgeous little Gnome hats for there little ones over at At the Butterfly Ball:

springbrook park 013


Craft Critters has created some great wall art for her little boys bedroom:

dinosaur wall art


I just love the fabric that Sew Much Ado has used for this car seat cover:

IMG_5390edit


Scrapbooking is something that I haven’t done in a very long time and I just loved this accordion baby album over at Clean & Scentsible:

Picnik collage baby albums


This frog is so cute and such a lovely gift idea for a little one.  Note Song shares her pattern here:

1


Sew, Cook, Laugh & Live has created this lovely Christmas onesie :

040_thumb[21]


And aren’t these the cutest little crochet boots.  You can find them over at Lil Pink Pocket:

gray baby boots


Well I best be going and get a start on my tutorial for tomorrow.  I have a few ideas but it’s which one to pick first.

Hope there is something here to inspire your next project/gift.

Have a great day!!!!

Wednesday, November 2, 2011

Tutorial Wednesday–The Ponytail Hat


I bought Miss J a ponytail hat for her birthday but when it came to Miss G’s birthday I couldn’t find another one in another colour.

DSC05970

So I set myself the challenge to make my own.  And wasn’t it a challenge.  Not only had I not made a hat before I decide to make my first hat with a pattern I adjusted myself.

DSC05972

Although I am happy with the end result, I did make a few mistakes and did a bit of unpicking.

For the pattern I used a simplicity Bucket Hat pattern that I downloaded from somewhere ages ago so sorry can’t tell you where I got it, which I have rescanned and you can download from here.

Now I’m sorry it’s not the best and you will have to join the second and third pages together as it wouldn’t fit in the scanner.

So what do you need to make your own hat, you will need a top and underneath fabric.  Miss G wanted Hello Kitty fabric which was in my scraps and I was lucky to just have enough for the top.  I used white for underneath and some interfacing that was of a medium thickness.  Using fusible interfacing would be much easier but mine was too thick for this. Oh and some velcro about 2 inches long.

First I cut out all my pieces out:


DSC05950


Then, I sewed the brim of the hat first with the right sides facing each other, leaving a small section to turn the brim right way out and top stitched and attached the velcro.  Now I assumed that there was hem allowance already in the pattern:

DSC05951

DSC05952

DSC05953

Next I sewed each of the crown pieces at the centre back seam.  Then I sewed the top of the hat.  Sorry I hope I am making sense and you should be sewing the 2 fabrics separately:

DSC05955

I don’t know what I did wrong but when I was pinning the top of the hat on it was like it was too big so I pinned it on and then adjusted it till it did fit:

DSC05957


DSC05958

Now you should have 3 sections of the hat to sew together:

DSC05959

Now I sewed the 2 pieces together. First I placed right sides together and sewed the half circle where the ponytail will go thru:

DSC05960

Then I turned the fabric right sides out and top stitched:

DSC05961

For the bottom of the crown I actually overlocked the pieces together so that I could have a practice on my new babylock but if you don’t have an overlocker you could just use your zigzag stitch.  If you don’t have a zigzag stick sew it all together leaving a small hole so that you can turn it right side out and then iron it flat.

DSC05962

Now all you have to do is pin the brim of the hat to the top part, sew and then turn down (brim is pinned upside down on the outside of the hat with the under fabric facing you).  You can top stitch it again on the right side if you wish but I just ironed it down.  And here it is:

DSC05965

DSC05967

DSC05987

I don’t think it turned out too bad!

DSC05969

As long as Miss G is happy with it that is all that matters.

DSC05971

DSC05976

Love my cheeky monkey models

Now this is the first time I have adjusted a pattern so please be gentle and I would love to hear your feed back.  If you have any problems with downloading the pattern please also let me know as this is the first time I have used Scribed.

Good luck and Happy Sewing!!!!

Thursday, December 30, 2010

First Tutorial.... Children's Apron

Well I thought it was time that I posted my first tutorial so here goes:

A couple of months ago my mum and I were at Spotlight and I noticed that the quilting material was half price so I just had to get the Michael Miller High Tea and Yummy fabric as I have been meaning to make my girl's and their cousin an apron and matching chef's hat for playing dress ups.

The first one I made was for my 4 year old niece for Christmas:


Materials:
1 metre Michael Miller's Yummy fabric
1 metre natural calico
2 metre's red cotton heading tape (25mm)
3 metre's red bias bind tapes (25mm)
2 buttons

Before I started I actually ironed the bias tape in half (double folded) as this is the first time I have really used it and I found it easier to pin to the edge of the apron.

So for a template I used my daughter's apron from her Jamie Durie's gardening set for kids:


Step 1: fold your template and fabric in half (fold fabric with right side facing in) then place the template on the fold of the fabric.  Draw outline of the template and cut out (I am using calico for the back of the apron and for the top of the matching chef's hat).

back of apron


front of apron

Step 2.   Now pin together the two fabrics with right sides facing out and sew together.


 Before I pinned the bias tape on, I trimmed any over hanging fabric. 


Step 3. Now for the bias tape.  At the beginning fold the end of the bias tape for a nice neat finish:


then you pin all away around the apron and leave a bit of length at the end so that you can  tuck it under the beginning of the bias tape:


Step 4. Now sew all away around.  I put the bias tape join at the bottom of the apron.


Step 5.  Now for the straps.  The apron that I have used as a template uses Velcro on the straps but I decided that I wanted to add a button hole at one end of the heading tape as I have some really cool buttons that will go so well with this fabric.


Now for some reason I have not taken any photo's of what I did for this part but here goes:

Cut a 50cm strip of the red heading tape and fold ends about 1 cm and sewed for a neat edge.

Step 6.  Sew one end of the tape to the top of the apron and then on the other end make a button hole (i used my button hole attachment for my machine).  If you don't have a button hole attachmeant for your machine, you can sew on velcro and still sew a button on the top.


Step 7. Sew the first button on top of the heading tape that you have attached to the apron.  Then sew the other button to the apron so that you can place the button hole end of the tape over the button to secure.

Where did I get the buttons will I purchased an assortment of Beutron buttons from spotlight that has hearts, flowers, stars, whales, bows, apples and of course these cute tea pots.  I thought the light green ones suited the apron best:


Step 8. So now for the ties on the apron.  I just cut the rest of the heading tape in half, sewed about 1 cm at the end over for a neat finish, then attached them about half way down each side of the apron:


And here is the finished apron!
For the Chef's hat, awhile ago I found a great tutorial that you can download from Making It Fun.  Check out this great blog and all the other great tutorials that you can try.

Here are a few more tutorials that I have found:

Oven Mitt tutorial at Skip to my lou
How to make a Chef's Hat for your budding masterchef at Curly Pops.
An Apron in an Hour by Stop sharing and start sewing
Make an Oven Mitt! at Prudent Baby
Free Pattern: Mini Me Apron Set at Living with Punks
Favourite Oven Mitt Tutoral with template at Pickup Some Creativity
Child sized oven mitt at Lily Bug Designs

Happy Sewing!!!!!