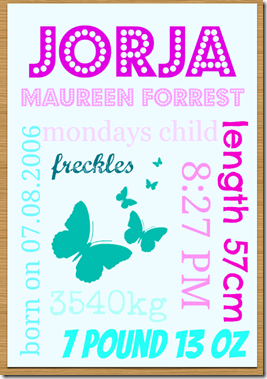
My next door neighbours daughter recently gave birth to her second child, Ella and I wanted to give them a little keepsake for the babies room, so I thought why not a Subway Artwork picture.
Here is one that was created in Picnik.com by BCheniful:
I have seen a few floating around on Facebook business pages and pinned on Pinterest and thought can’t be that hard and why not use PicMonkey to create one.
For my example I am actually going to create one using my Jorja’s details just in case the family doesn’t want their babies details on the big world wide web.
Ok here goes, first you will need your blank canvas and to get one all I did was click on create a collage and select what format I wanted the picture to be eg landscape or portrait.
Now don’t worry about the outline of the individual frames as they will not appear when you open the blank collage in photo edit. I chose Pinter-etsy so that the picture would be in portrait.
You can also choose what colour you would like for the background here on the left hand side by clicking on the little paint palette. Just give it a name I’m calling it Jorja’s subway art and save it to your computer.
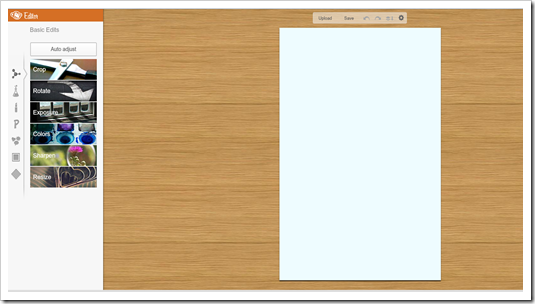
Next step you will need to close this collage and then click on Edit Photo and upload your blank canvas.
So this is what you should be looking at now:
Let’s start adding our babies details. Click on the P icon so that you can start typing. Now you can put whatever details you would like on the subway artwork anywhere you like.
I am going to put Jorja on the first line using the BUDMO JIGGLER font, size 100 with the colour code E000E2. Then on the next line I am going to enter her middle and last name together and in a lighter shade. I am also going to use different shades of pink and blue for this.
Now for her birth date, weight and what time she was born.
I used the font Schoolbell size 82 for her birth date and to turn it on it’s side you hover your mouse over the top toggle until two around that are in a circle appear (the picture is showing the toggle that I am talking about but unfortunately the arrows don’t appear when using print screen):
For her weight I used BANGERS font size 116 and for the time I used Droid Serif size 100. To change the size you can place your mouse over the corner of the box that the writing is in and when the arrow appears you can drag the corner up or down by holding down your left button on the mouse till you get what size you like or you can change the size using the slide bar on the text box on the left hand side of your screen:
I thought I might add her weigh in as kilos too and her length. I used Special Elite and Chelsea Market size 115:
There are also overlays/pictures that you can use to put on your canvas by selecting the overlay icon on the left hand side:
I have chose a butterfly overlay and used the colour 00BDAF. What do you think so far.:
Just one more thing to add and I think I will put in Monday’s Child as she was born on the Monday. And here you have it. I used Georgia font (thought it was fitting) size 88 and I changed the size of the time of birth to make it all fit better. Oh and I just can’t get enough of her freckles (Marcelle Script size 100):
I love it and I’m going to do one for Grace and Ethan and put them all in a frame that holds 3 pictures and hang it for all to see.
So what are you waiting for head on over to PicMonkey and start creating. Would love to see what you came up with over on my Facebook page.
Have fun!!!!
PS don’t forget to save your work along the way!
Blogger Labels: Tutorial,Subway,Artwork,keepsake,babies,room,Picnik,BCheniful,Facebook,Pinterest,PicMonkey,canvas,collage,Pinter,computer,font,text,pictures,Child,Script


No comments:
Post a Comment